Ninis World Nini's World SiteNinis Swedish BlogNinis English blog

Place Image in Text – Tutorial for Adobe Creative Suite

BACK TO TUTORIALS AND LINKS CONTENT

This tutorial shows how to place an image inside a text in Adobe InDesign CS, Adobe Illustrator CS and Adobe Photoshop CS. In InDesign and Illustrator these are the only methods there are (as far as I know). In Photoshop there might be other methods to do it that I am unawere of. If there are, email me and I will publish those methods as well.

nini ;-)

IN INDESIGN CS

Type the text. Choose a fat font and a fontsize that is good for filling with an image.

Select the text with either the Texttool or the Selection tool (black arrow).

In the menu Text /Type choose Create Outlines.

(Watch out: Depending on how you do this, you might get a textbound image inside a textframe. If you do cut it and paste it separately on the page.).

Then select either the text outline with the direct selection tool (white arrow) or the frame with the selection tool (black arrow).

Then choose Place. Check that you have checked Replace selected item. Choose your image and it will be placed inside the text outline. Use the directselection tool (white arrow) to select the image and to move it so you see whatever part of it you want to see and also to scale it the way you want to. Note: The text is no longer editable.

You can of course add a stroke, a shadow, a feathering for the filled textoutline after you have created it, and use transparency and blendmodes just as usual.

IN ILLUSTRATOR CS

Create the document.

Place the image. (Choose if to embed it or to link to it. if you link to it, the image must accompany the AI document if you sent it elsewhere than your own computer).

Create the text ON TOP of the image (can be another layer if you so choose but does not need to be separate layers). Scale the placed image to the size you want it to appear inside the text.

Select both the textobject and the image object.

In the menu Object choose Clipping Mask, Make...

The image will now be shown inside the text.

You can select the image with the direct selection tool (white arrow) and move it if needed.

The text is still editable and you can select it with the text tool and write something else if you should wish to.

At any time you can separate the two objects by selecting them and choosing Object/Clipping Mask/Release.

There are a few effects you can use on this image-in-text object. Try them out.

If you rather want a text outline to place into, you can do that also in Illustrator just like in InDesign. You can however not place into the text outline in Illustrator. You still have to make a Clipping Path to limit the viewable area of the placed image to inside the text outline. Then not making a text outline is more flexible as you can still edit the text.


IN PHOTOSHOP CS

Create a new document with desired dimensions.

Choose the textmask tool (the one for horizontal text - the textmask tool is under the regular text tool) and set the parameters for font and fontsize and style.

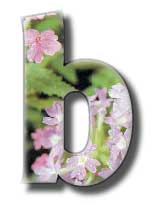
Type whatever text you want.

Press Enter. You now have a selected textmask.

Open the document with the image and select the wanted portion from it. Copy.

Go back to the original document with the textmask.

Choose Paste Into from the Edit menu.

By choosing the Move tool when that layer - which is created automatically - is chosen - you can move the image inside the text to your desired position.

This text is not editable and not - as far as I know - movable (if anyone knows how to move it, tell me please). You can however use any layer effects there are in Photoshop on its layer, like shadows, feather, distortions of any kind. And of course blends and the rub.

Federico Platon provides a much easier way to do this in Photoshop CS (Thanks Federico!):

1. Open an image file.
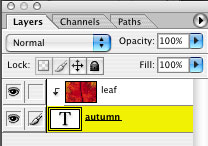
2. Double click the layer (rename it in order to allow it to move up and become a regular layer instead of a background layer – the background layer is locked).
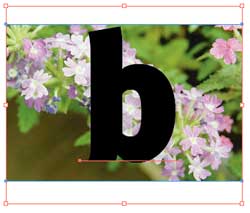
3. Now with the type tool, type some text.
4. When you are happy with the textsize, typeface, position etc., move the textlayer beneath the image layer in the Layer palette.
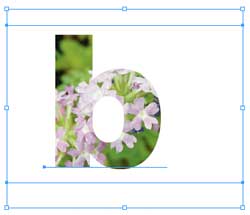
5. Now select the image layer in the layers palette and choose Create Clipping Mask in the Layer menu at top of window. Or even faster, just click in the Layers palette between the two layers while holding down the Alt/opt key.

If you need to adjust the position of the  "mask", use the Move tool in the Type layer. Or if you need to edit the text, select the type layer and use the type tool.

The mask is vector data, which is resolution independent so it prints sharp. If you need to place the image in InDesign CS, export it first as PDF from Photoshop CS in order to not rasterize it.


Have fun. Experiment.
If anyone has other methods of doing this send me a mail explaining the method and I will publish it too.

Back to Tutorials and Links ContentTo top of page