Ninis World Nini's World SiteNinis Swedish BlogNinis English blog

Making screenshots in Mac OS X

Those of us who often write tutorials or course materials for computer applications, often need to show how a dialog box or a menu or something looks on screen. We then do a screenshot.

In Mac OS X you can make a screenshot in a couple of different ways:

Take a picture of the whole screen

Press + Shift + 3

Take a picture of a chosen part of the screen

Press + Shift + 4 – You then get a crosshair cursor. With the crosshair cursor select a rectangular area of the screen that you want to take a picture of.

Take a picture of a menu or a dialogbox or a window

Press + Shift + 4 + Spacebar – you get a camera-cursor which you can move from window to window or to an open menu (click once to make the menu hang on screen and not just temporarily show). When your camera is hovering over a window or menu or such, it gets selected with your regular selection color. When you click, the selected window or menu has its picture taken.

OSX 10.2 Jaguar and 10.3 Panther fileformat for screenshots is PDF. In OSX 10.4.x Tiger, the fileformat for screenshots is .PNG (see below for how to change the default back to PDF from PNG – or to something else). If you prefer another imageformat for your screenshots, you can get that by taking the picture to the clipboard instead of saving it automatically to the desktop, which is the default behavior of the above commands.

When the image is saved to the clipboard you can go to any application that can handle images and create anew document and place that image into the new document. You then save it or export it in your preferred imageformat.

Take a picture of the whole screen to the Clipboard

Press + Shift + 3 + Ctrl

Take a picture of a chosen part of the screen to the Clipboard

Press + Shift + 4 + Ctrl – You then get a crosshair cursor. With the crosshair cursor select a rectangular area of the screen that you want to take a picture of.

Take a picture of a menu, a dialogbox or a window to the Clipboard

Press + Shift + 4 + Spacebar + ctrl – you get a camera-cursor which you can move from window to window or to an open menu (click once to make the menu hang on screen and not just temporarily show). When your camera is hovering over a window or menu or such, it gets selected with your regular selection color. When you click, the selected window or menu has its picture taken.

In all the above three cases, when the picture is taken to the Clipboard, move to the recieving application. The procedure for Preview, Adobe Photoshop and Adobe GoLive is as follows:

Preview NewPreview imageformats

In Preview – which comes with OS X – you choose File, New from Clipboard and a new, unnamed document is created with the content and dimensions of what you took a picture of. You then choose File, Export... and in the bottom part of the dialog, choose Format:

You can then choose one of the formats to the left. Do NOT choose PICT as that is a Mac-only imageformat.

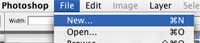
In Adobe Photoshop CS (or earlier) you choose File, New...

Adobe Photoshop New

Adobe Photoshop CS New file dialog

Photoshop automatically creates a new document from Clipboard with the exact dimensions and resolution as the picture you took. In the new, empty document, chose Edit, Paste to get the image into the document.

If the image is meant to be used on the web, then choose Save for Web and do your settings for the Save for Web output and save it either as a GIF or a JPG.

If the image is meant for print, then choose File, Save as... and choose your wanted imageformat. Do NOT change the resolution of the screnshot even if the image is meant for print. Most of the time it does not make it any better.

If you are using Adobe GoLive for your web-editing and you don't want to go via another application to handle your screenshot, you can paste directly into the page in Adobe GoLive. When you do that you also get the Save for Web dialog, like in Photoshop, and can do your settings and save the image to your sitefile at the same time as it gets placed on the page.

Change fileformat for screenshots in OSX 10.4.x and later

There IS a method to change the fileformat for screenshots in Mac OS X 10.4.x and later. The method was described by TidBITS (a very good website and periodic newsletter with good content) some time ago. This is how they describe how to do it:

1 Open the application Terminal (which you find in the Utilties folder inside the Applications folder).
2 Copy the "defaults write" line below, paste it into the Terminal window, and press Return.
defaults write com.apple.screencapture type pdf

3 Log out or restart your Mac to make it pick up the new setting.

If you wish to reset the file format back to PNG, just repeat the steps, replacing "pdf" in the "defaults write" line with "png".

GET TUTORIAL AS PDF (148 K)

LAST UPDATED 2014-01-03

To top of window